Technical characteristics of the Gorenje BM 1210 BK bread machine
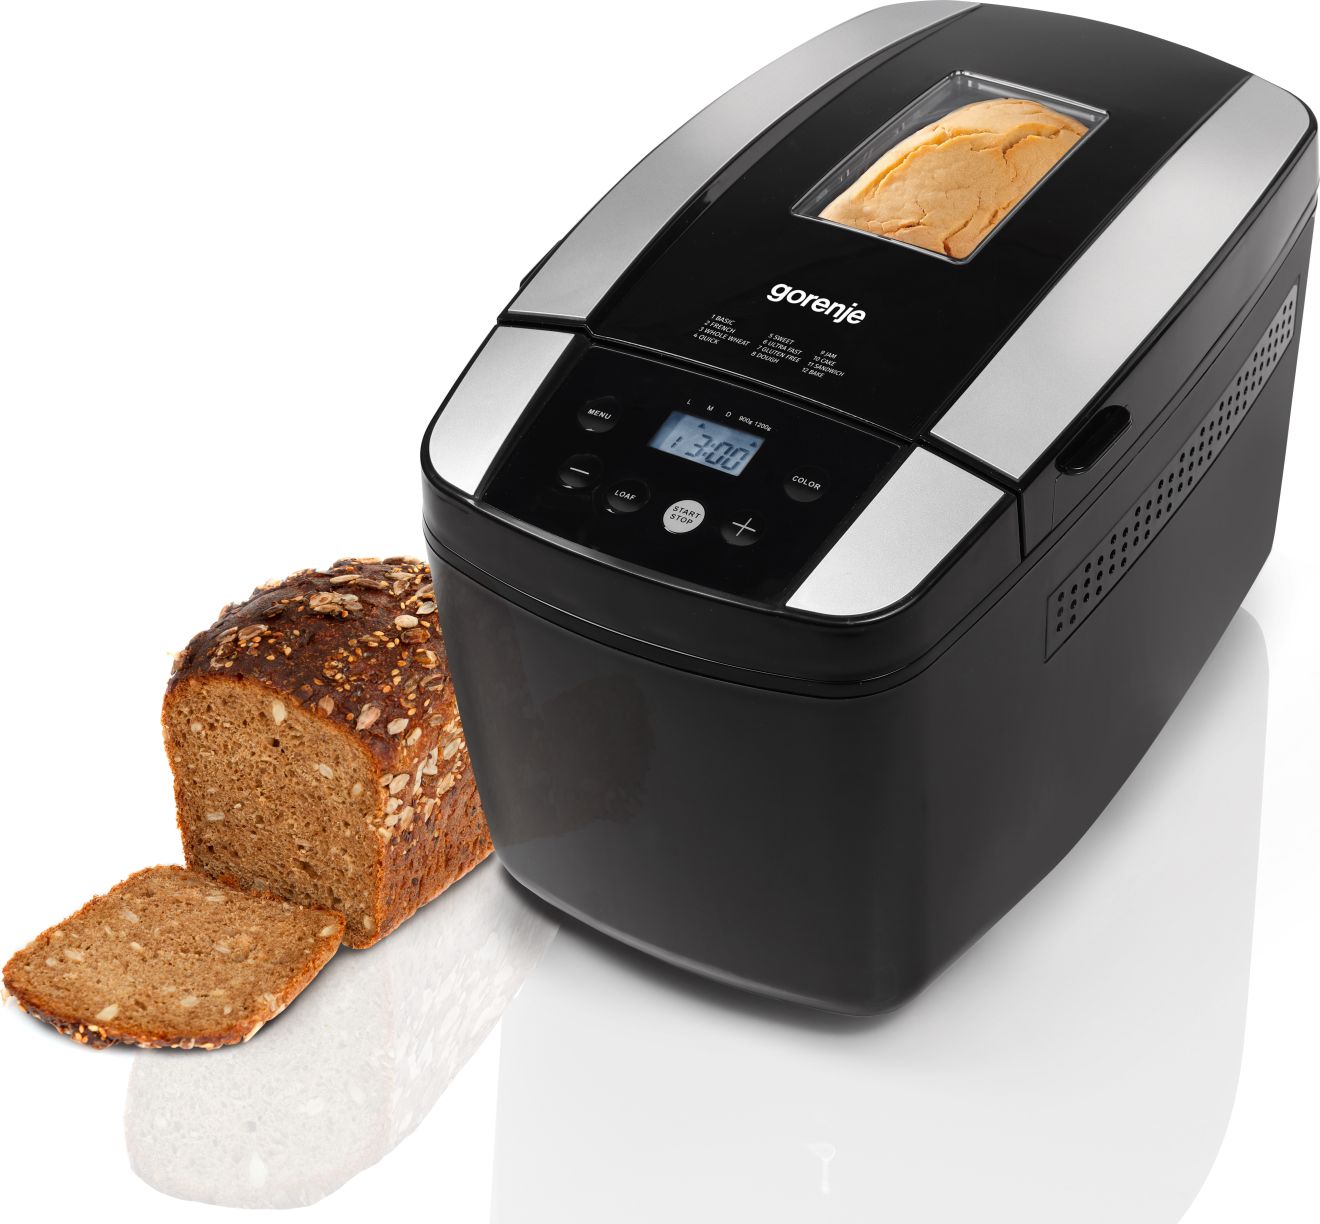
- Removable non-stick baking dish
- Number of removable bakeware: 1
- Number of kneaders: 2
- Non-stick coating of kneaders
- Number of baking sizes: 2
- Selectable baking size (min-max): 900 - 1,200 g
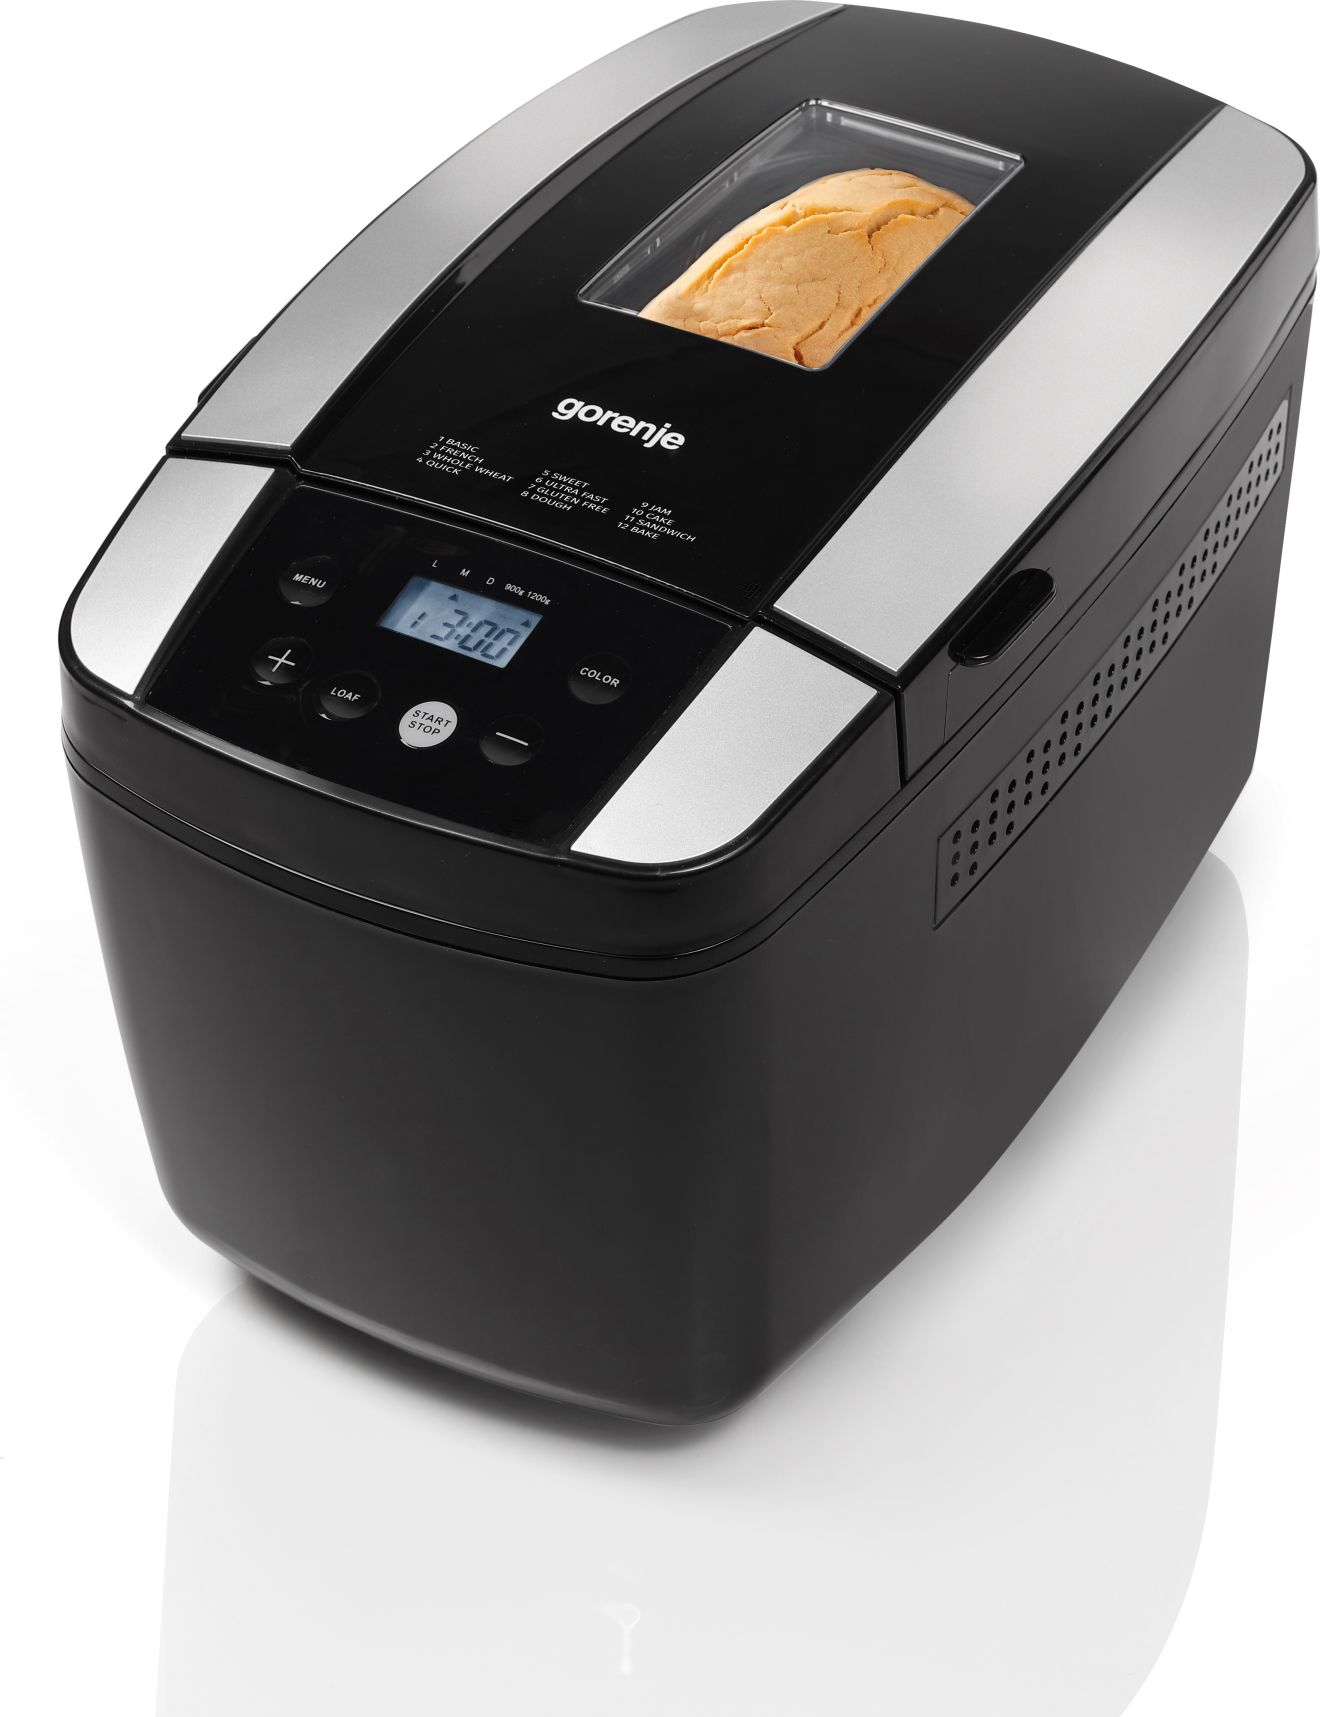
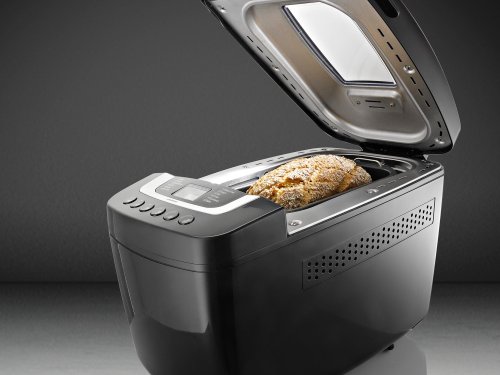
- Viewing window allows you to follow the cooking
- Number of programs: 12
- Kneading program
- Sound signal
- Keep warm function keeps bread warm
- Continuing a program in the event of a power failure
- ON button.
- Choice of crust color
- LCD display
- Dough lifting program
- Fast baking program
- Jam program
- Gluten Free Baking Program
- Beaker
- Scoop
- Rubberized anti-slip base
- Recipe book for new ideas
- Auto power off for added security
- Material: Plastic + metal
- Heater power: 800W
- Connecting cable length: 1.2 m
- Dimensions (WxHxD): 26.2 × 27.8 × 42.5 cm
- Package dimensions (WxHxD): 30.5 × 34 × 47.5 cm
- Net weight: 6.1 kg
- Gross weight: 8.1 kg
- Connected load: 800 W
- Article: 734331
- ЕАN-code: 3838782326622

Morning delight
Let not an alarm clock wake you up in the morning, but the smell of fresh bread. This provides a function that allows you to delay the start of baking at any time (up to 13 hours). You don't even need to get out of bed - the bread will already be baked. In the evening, put all the ingredients in the bread maker, select the program and set the cooking start time, and the next day, fresh aromatic bread will be waiting for you for breakfast.
Gluten free
Do not deny yourself the pleasure
Gorenje has also taken care of those who consume gluten-free bread. Due to the nature of the gluten-free flour, which takes longer to take and bake, we have added the gluten-free program. The Gorenje Bread Maker does not require additional hand kneading to make excellent gluten-free breads. The baking time is longer compared to conventional flours.
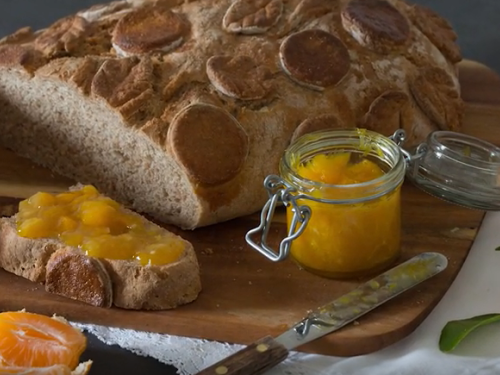
Make your favorite jam
Gorenje bread makers can do more than just bake bread. They have a preset program for making excellent homemade jams. Cut the fruit into pieces, add sugar if desired and select the Jam program. No additional worries, mountains of dirty dishes and wasted time. You can make great jams with no extra effort.
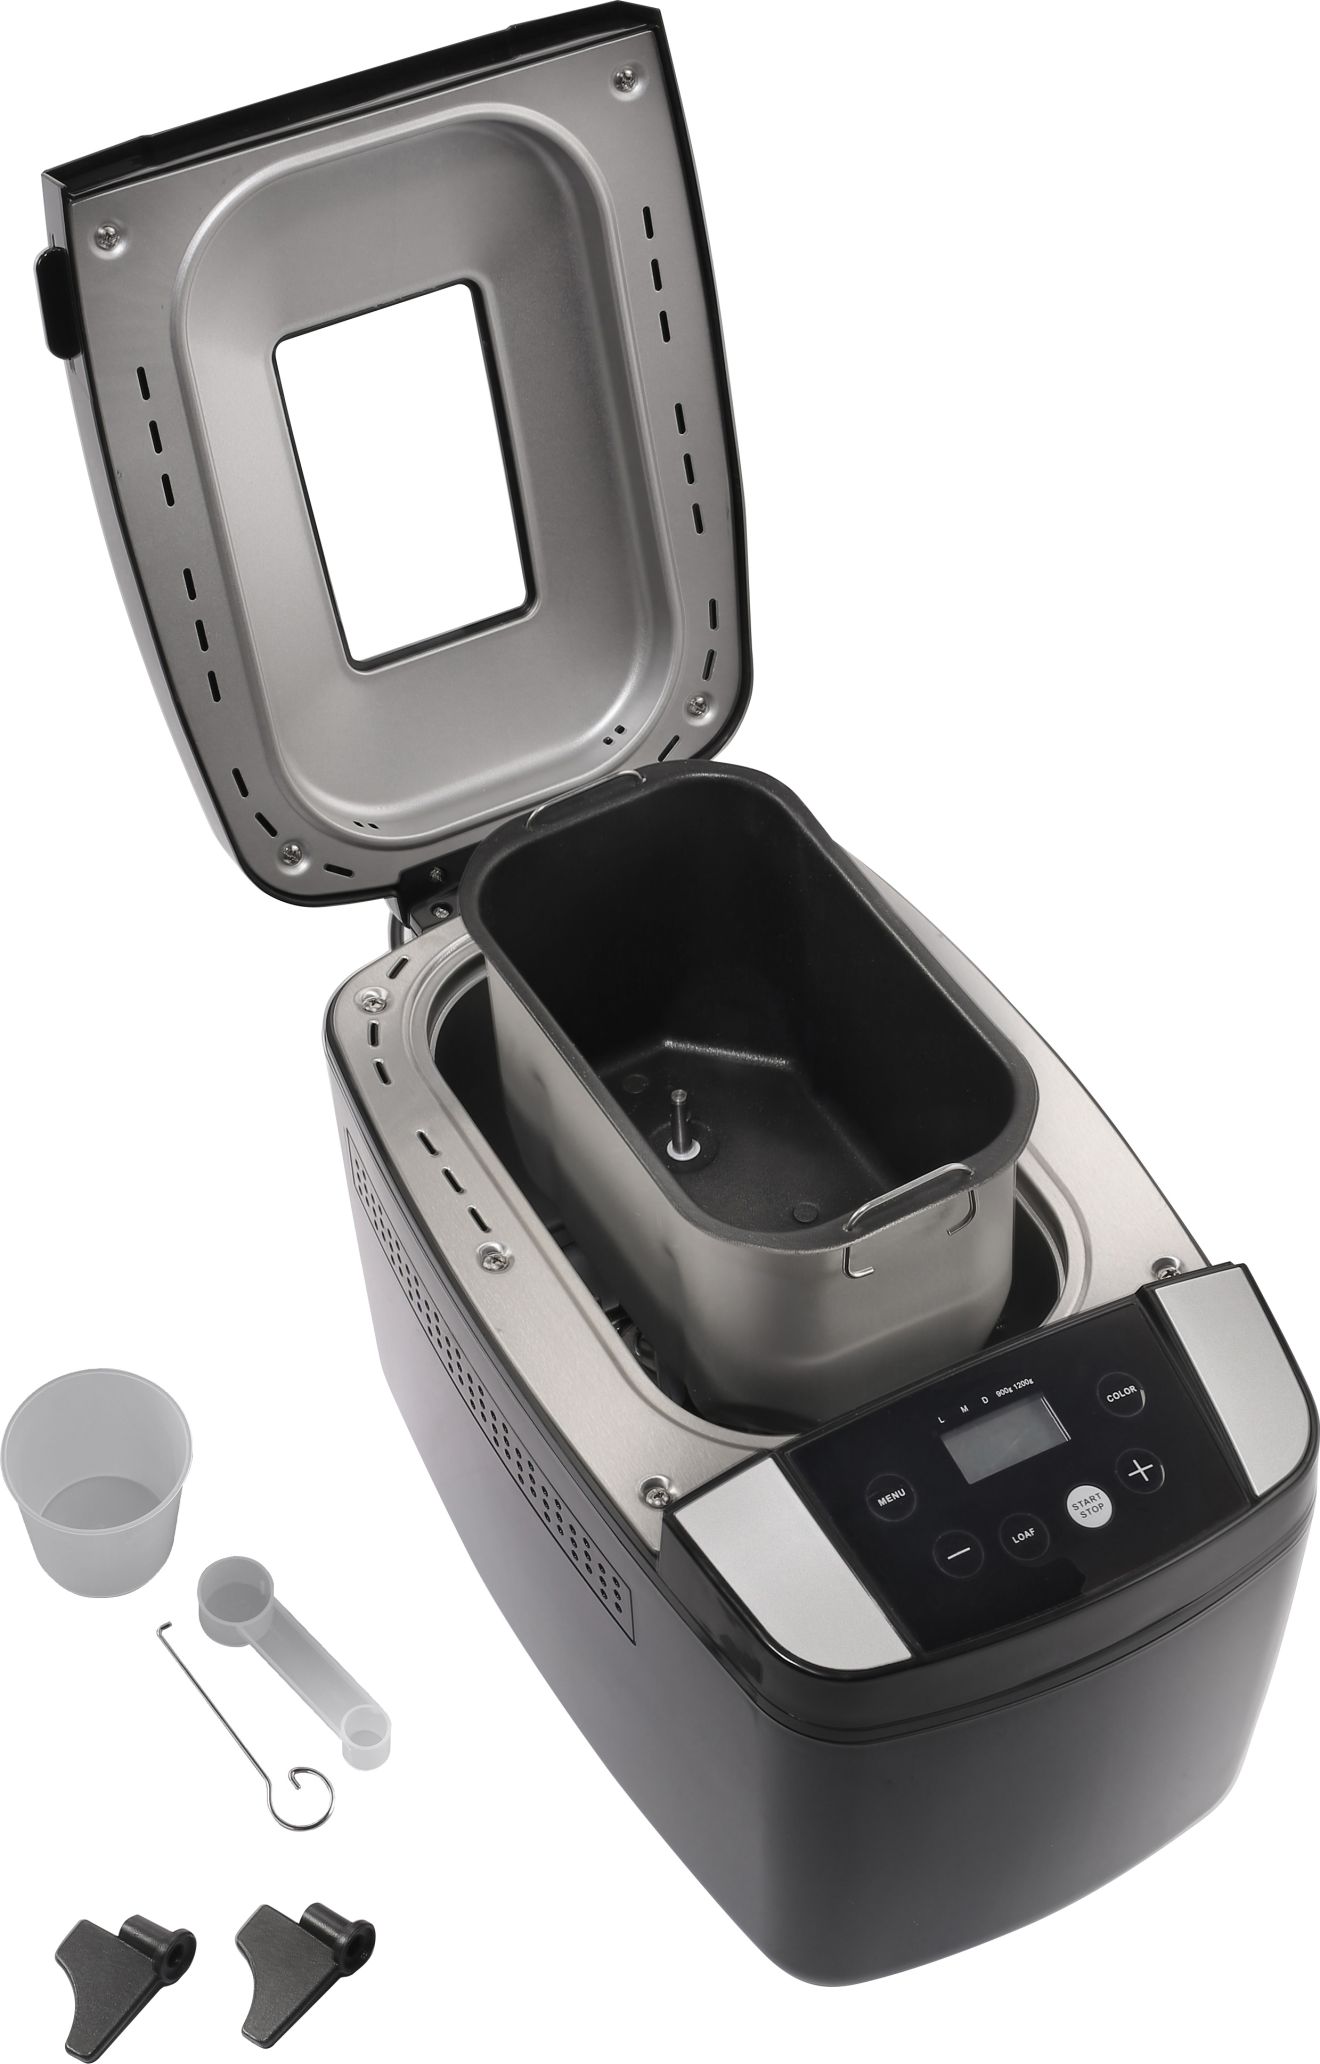
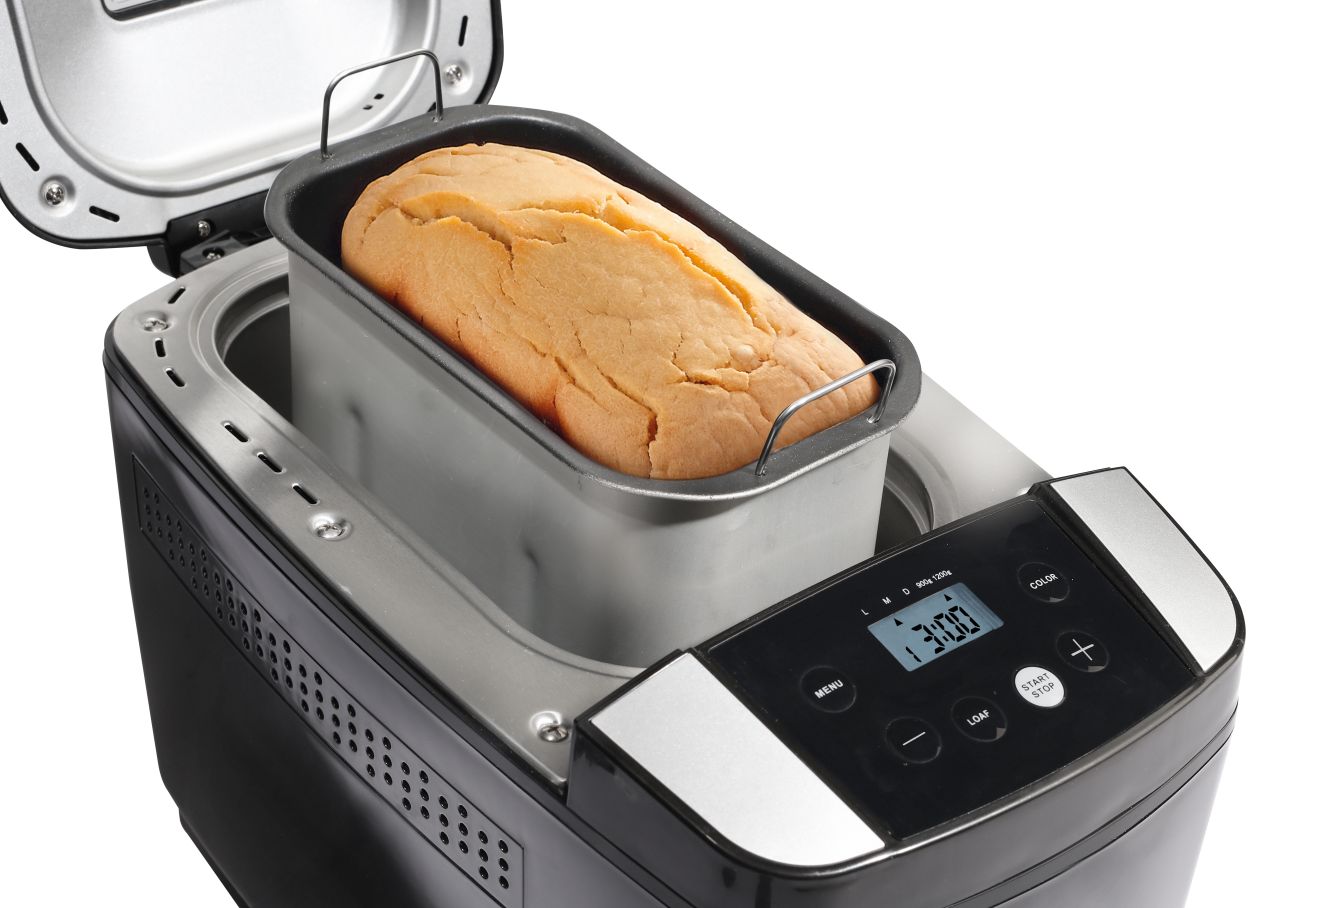
Bread maker device Gorenje BM1210BK
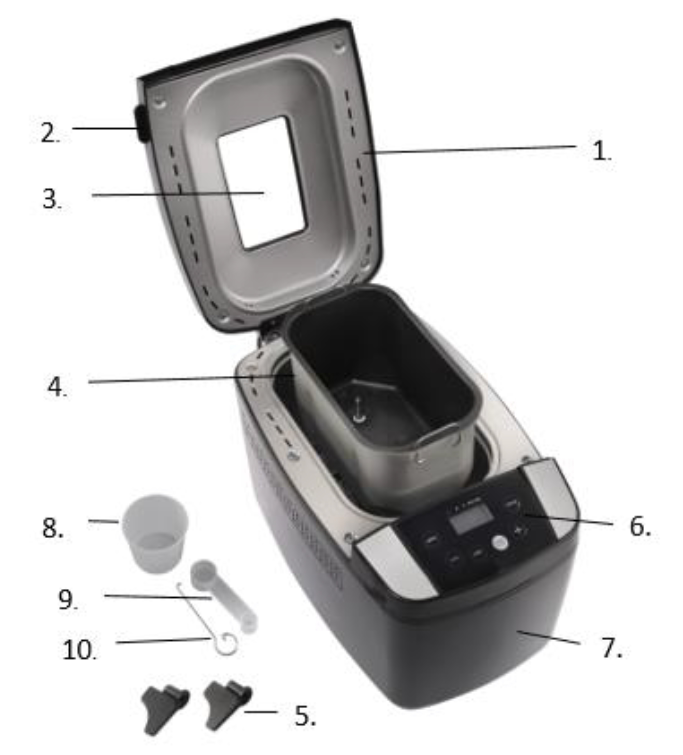
- Cap
- Cover handle
- Viewing window
- Baking dish
- Kneading paddle
- Control Panel
- Housing
- Beaker
- Scoop
- Hook
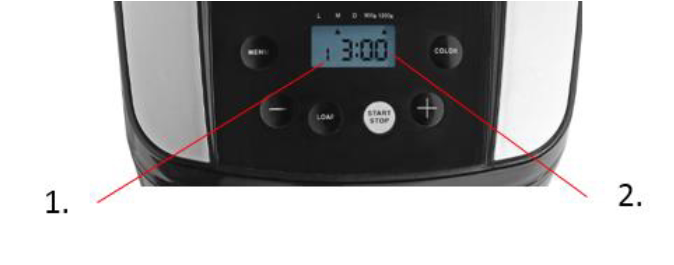
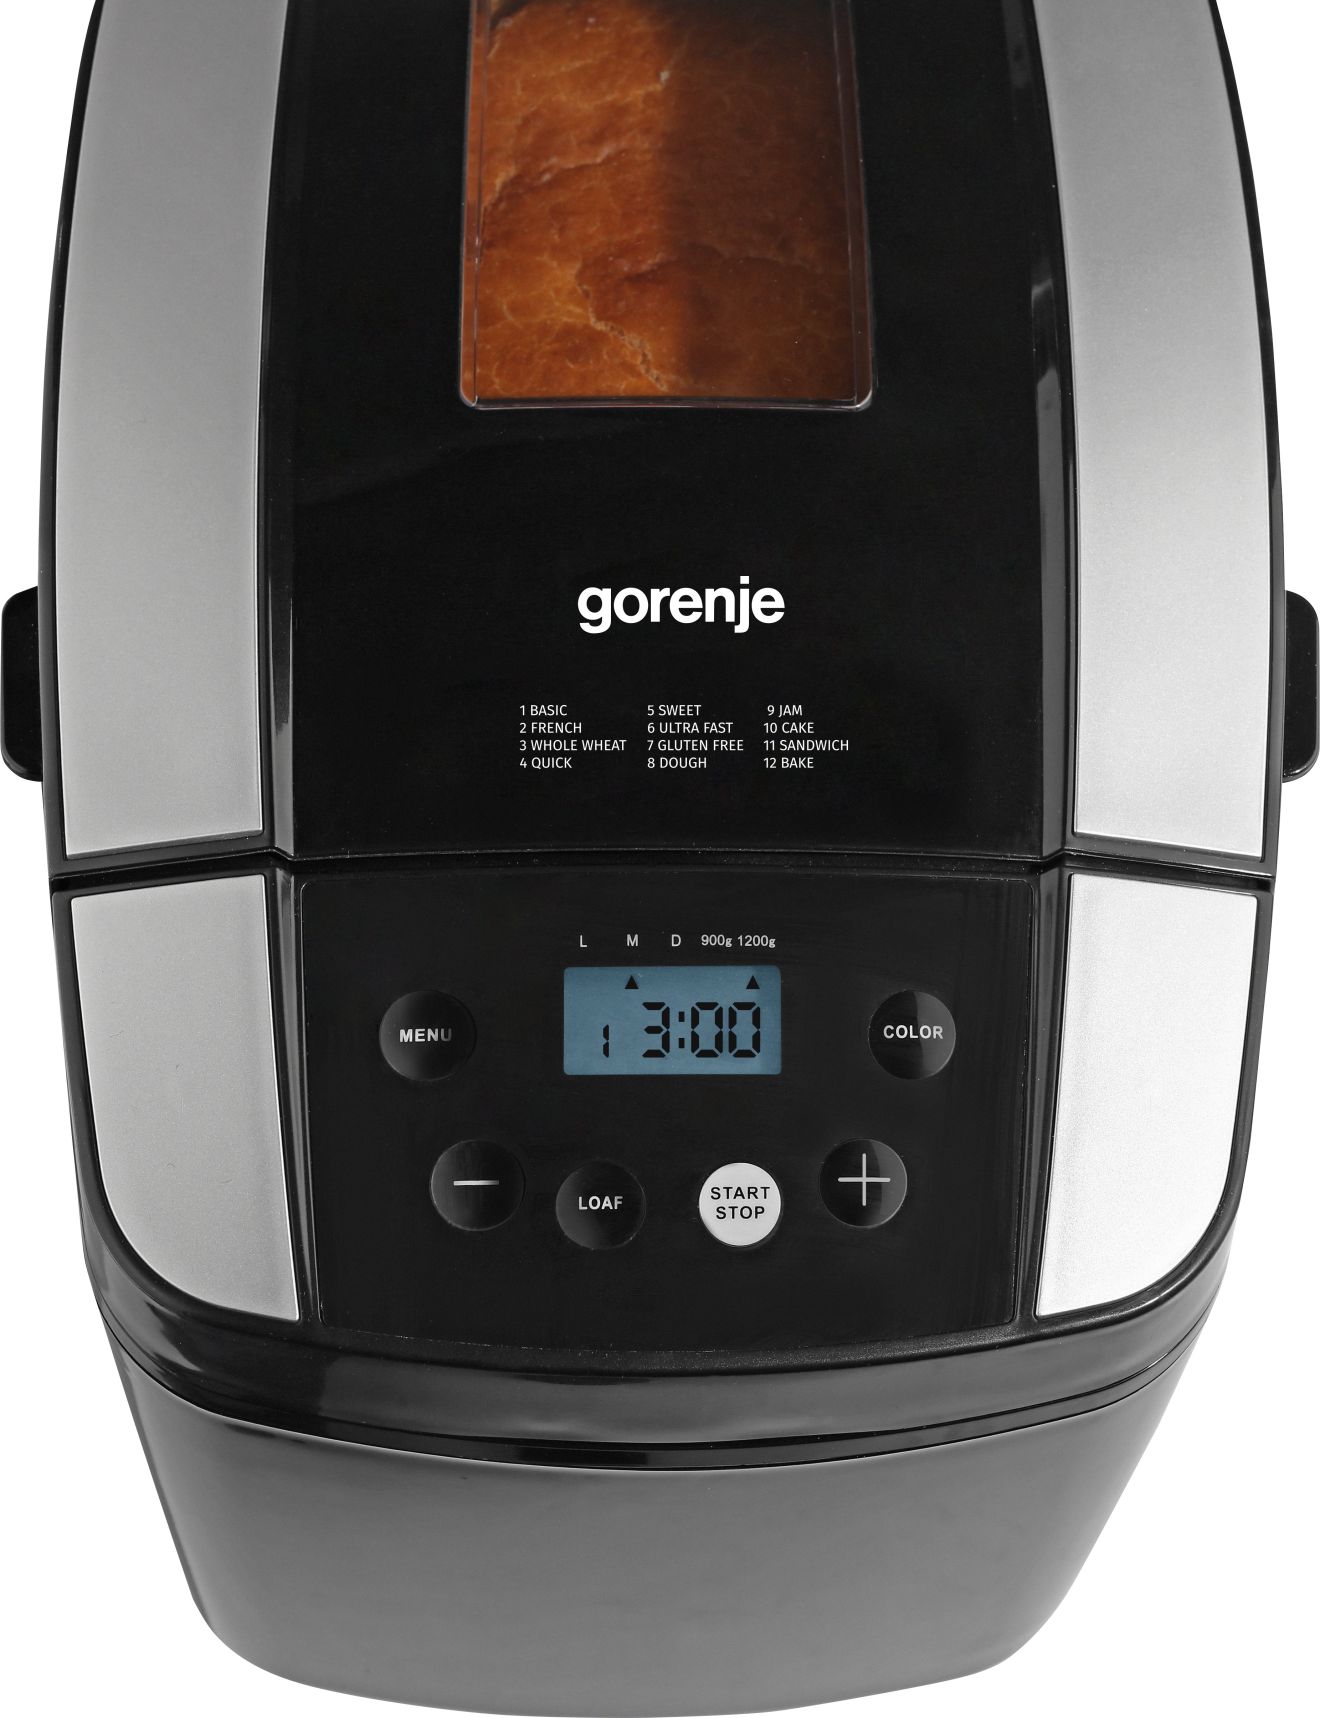
- 1. Index of the selected program
- 2. The duration of each program.
Start / stop
For starting and stopping the selected baking program.
Press the START / STOP button to start the program. A short beep will sound and two dots on the time display will flash, after which the program will start. Once the program has started, any button other than START / STOP will be inactive.
To stop a program, press the START / STOP button for about 3 seconds, after which a beep will sound to indicate that the program has stopped.
Menu (MENU)
It is intended for setting various programs. The program changes with each press (accompanied by a short beep). Pressing the button intermittently will cycle through 12 menus on the LCD. Select the required program. The functions of the 12 menus are shown below.
1. Basic: for white and mixed bread made from white or rye flour. The bread has a dense texture.You can make the bread brown by using the Color function.
2. French pastries: for light bread made from fine flour. French bread requires a specific time and temperature regime to achieve a delicious brown crisp. Not suitable for recipes containing butter, margarine and milk.
3. Whole wheat: Whole flour bread is a yeast bread made with a substantial portion of whole wheat flour (50% or more). This type of bread is more nutritious because the flour is made from the kernel of a wheat grain (including bran and sprouts). The use of whole flour gives the bread a brown or dark brown color, which is healthier than regular bread and also more flavorful.
4. Quick: The size of the loaf and the bake delay time are not adjustable. Kneading and raising the dough, baking a loaf in less time than with the Basic bread program. However, bread baked using this setting is usually smaller and has a tighter crumb.
5. Sweet: This program is set to bake breads high in sugar, fat and protein. This bread will have a brown crust. The long kneading phase makes the bread fluffy and fluffy.
6. Ultra fast: Time delay cannot be set. Kneading and raising dough, baking in a very short period of time. This bread will be smaller and denser than the Quick bread.
7. Gluten free: Bread without vegetable protein (gluten) has unique ingredients. Although this bread is categorized as “yeast bread,” its dough is generally wetter and more like a pancake dough. It is important not to overexpose
such a dough and stop kneading in time. Such a dough rises only once, and the baking time is increased due to the increased moisture content of the dough. Put all the additives in the dough at the very beginning of the kneading along with the rest of the ingredients.
8. Dough: No color or size adjustments are applied to the loaf. Kneading and raising the dough, but without baking. The dough is removed and used to bake rolls, pizza, steamed bread, etc.
9. Jam: No color, loaf size or time delay settings are applied. Press the START / STOP button immediately to start the program. In the bread maker you can make great jam and confoure! The paddle will knead the ingredients throughout the entire process of making jam or confiture - a great addition to bread.
10. Cake: knead, rise and bake, but rise with baking soda or baking powder.
11. Sandwich: knead, rise and bake light bread with a thin crust.
12. Bake: the loaf size and time delay settings are not applied, but the program time can be changed by pressing the “TIME +” or “TIME—” button. By pressing once you increase or decrease the cooking time by 1 minute. The time can be adjusted from 10 to 60 minutes.
You can use this program to additionally bake bread that is not sufficiently baked without kneading and raising the dough.
Color
This button selects the crust color: Light (LIGHT), Medium (MEDIUM) or Dark (DARK). After each press, you will hear a short beep.
This function only applies to BASIC, FRENCH, WHOLE-WHEAT, QUICK, SWEET, ULTRA FAST, GLUTEN FREE, CAKE, SANDWICH and BAKE programs.
Loaf
Pressing this button selects the size of the loaf. Please note that the total cycle time may vary depending on the size of the loaf. By pressing this button the size of the loaf is selected: 900 gr. (900g), 1200 gr. (1200g) - after selecting the required size, it will be displayed on the LCD. The loaf size selection function is not applicable to all programs. A detailed description of the programs is given above in the "Menu" section.
Time
If you are not going to start the cooking process immediately, this button can be used to set the delay time and the device will start cooking after the specified time.
To set the delay function:
1) Choose your menu program, color and size of the loaf.
2) Set the delay time by pressing the Time button (“TIME +” or “TIME—”). The duration of the delay must include the duration of the selected menu program. For example, it's 8:30 pm now and you want the bread to be ready to eat the next day by 7:00 am. In this case, the delay will be 10 hours 30 minutes. Press the Time (“TIME +” or “TIME—”) button until the display shows 10:30. Each press increases the time by 10 minutes.
3) Press the STOP / START button to activate the program. The dot will blink and the remaining time will count down on the LCD.
Note: the maximum delay time is 13 hours. Do not use perishable ingredients, such as eggs, fresh milk, fruits, onions, with the set time delay.
HEATING
Within an hour after baking, the bread can be automatically reheated to keep it warm. To remove the bread during the heating program, press the START / STOP button to stop it.
Note: The DOUGH and JAM programs do not have a heating function.
MEMORY
If the power is turned off while baking bread, the bread-making process will automatically continue for 10 minutes, even if you do not press the START / STOP button.
If there is no power supply for more than 10 minutes, the data is not saved in memory, which will require you to knead the dough again and restart the bread maker. However, in case the dough does not start to rise when the power is turned off, you can start the program from the very beginning by simply pressing the START / STOP button.
ENVIRONMENT
The appliance is designed to operate over a wide temperature range, but breads baked in very warm or very cold rooms may vary in size. The recommended room temperature range should be between 15 ° C and 34 ° C.
Display warning
1. If the display shows “H HH” after pressing the “START / STOP” button, the temperature inside the appliance is still too high. Stop the program execution. Open the lid and leave the device to cool for 10-20 minutes.
2. If the display shows “L LL” after pressing the “START / STOP” button, the temperature inside the appliance is too low. Stop the program execution. Open the lid and leave the device to cool for 10-20 minutes.
3. If the display shows “E E0” or “E E1” after pressing the “START / STOP” button, the temperature sensor is defective and needs to be checked by an authorized technician.
BREAD BAKING PROCESS
1. Place the baking dish in the working position and then turn it clockwise until it clicks into the correct position. Fix the kneading paddle to the drive shaft. To prevent the dough from sticking to the kneading blades and to easily separate them from the bread, it is recommended to grease them with butter.
2. Place the ingredients in a baking dish. Follow the steps in the recipe. Typically, water or liquids are poured first, then sugar, salt and flour are added, and yeast and baking powder are poured last.

Note. The maximum amount of flour and yeast is indicated in the recipe.
3. Make a small hole in the surface of the flour and then pour the yeast into it, being careful not to mix the yeast with liquid or salt.
4. Carefully close the cover and plug the power cord into an electrical outlet.
5. Press the MENU button to select the desired program.
6. Press the COLOR button to select the desired peel color.
7. Press the LOAF button to select the desired loaf size.
8. Set the duration of the delay by pressing the TIME + or TIME— button. You can skip this step if you want to start the bread maker right away.
9. To start the device, hold down the "Start / Stop" START / STOP button.
10. At the end of the process, 10 beeps will sound.To stop the process and take out the bread, you need to hold the START / STOP button for about 3 seconds. Open the lid and use the oven mitts to turn the baking dish counterclockwise, then remove the bread.
Caution: baking dish and bread can be very hot! Always be careful.
11. Let the baking dish cool before removing the bread. Then, using a non-stick spatula, carefully separate the bread from the baking dish at the edges.
12. Turn the baking dish upside down over a cooling net or clean kitchen surface, then gently shake it until the bread falls out.
13. Leave the bread to cool for about 20 minutes before eating. It is recommended that you cut the bread with an electric cutter or a serrated knife, not with a fruit knife or a kitchen knife, otherwise the bread may become deformed.
14. If you do not press the START / STOP button when baking is complete, the bread will automatically reheat for an hour and then 10 beeps will sound.
15. Unplug the power cord from the socket when the appliance is not in use or after baking.
Note. Before slicing the loaf, remove the kneading blade that is baked into the bottom of the loaf using a crochet hook. The loaf is hot, so do not use your bare hands to remove the kneading paddle.
Note. It is recommended to store bread in an airtight plastic bag or container. Bread can be stored at room temperature for three days. For long-term storage, it is packed in a sealed plastic bag or container, and then placed in a refrigerator, where it can be stored for up to ten days. Since no preservatives are added to homemade bread, it usually has a shorter shelf life than factory baked bread.
Cleaning and maintenance
Before cleaning the appliance, you must disconnect it from the mains.
1. Baking dish: Wipe clean inside and out with a damp cloth. Do not use sharp objects or abrasive products.
2. Kneading arm: If the kneading arm cannot be removed from the axle, pour water into the baking dish beforehand.
3. Case: Gently wipe the outside of the case with a damp cloth. Do not use abrasive products, as this can damage the polished surface. Never immerse the case in water for cleaning.
Note: Do not remove the cover for cleaning.
4. Before packing the bread maker for storage, make sure that the appliance is cool after use, clean and dry, and the lid is tightly closed.
This appliance complies with the CE directives regarding interference suppression and low voltage safety and has been manufactured in compliance with the current safety requirements.