|
This method of decorating materials uses fruits and vegetables with a hard skin or hard flesh, such as lemons, oranges, bananas, apples, cabbage, peppers, etc. Cut the fruit into halves or quarters. Two fruits usually produce four patterns for printing a pattern.
Press the smeared model against the material. Lightweight cotton fabrics, semi-linen fabrics or fabrics made from cotton and synthetic fibers are most suitable for printing.
Cauliflower printing
Let's give an example of decorating a tablecloth. Select a few small but hard cabbage heads 12-15 cm in diameter. Prepare a large, sharp knife, a medium-sized dye mixing plate, 1-2 paper napkins, a jug of water, 1-2 large soft-bristled brushes, and dye (printing ) material. It is best to use special stamp inks that are resistant to water and light after drying the material.
Head cauliflower cut exactly in half. Leave one half intact, and tear off a few inflorescences from the other so that the other half becomes very small. This gives you three print models.
In this case, print with five colors, each of which is obtained by mixing two colors. These are golden yellow, beige yellow, light green, grass green and dark green paints.
With your left hand, grab a large half of the cabbage, and use your right soft brush to paint the cut.
Place the material on a hygroscopic surface. First of all, print the pattern with a half of a cabbage head in a golden yellow color, 5-6 cm from the edge of the fabric. At the same time, press the painted surface of the head against the fabric evenly with both hands. After that, on both sides of the print, make two prints in the same way with smaller models, one with green ink and the other with beige. In the same way, make prints near them with cut small inflorescences. Fill the entire surface of the fabric to your liking. After the paint has dried, iron the fabric from the wrong side with a weakly heated iron.
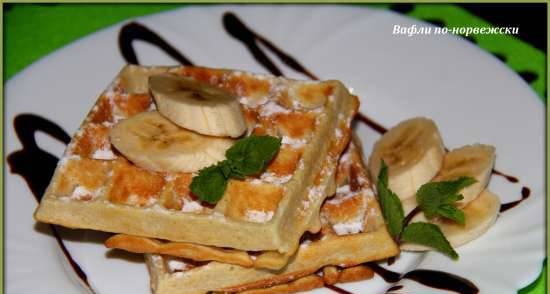
Banana and Lemons Printing
Similarly, the fabric can be decorated with fruits. For example, take two lemons, one large and round and the other small and oblong. Two more solid, not fully ripe bananas, two long-bristled brushes, several paper towels, one dish for dissolving the paint, two bottles of golden yellow paint, one bottle of light red, one brown and one dark green are needed. When mixing equal parts of golden yellow and dark green paint, light green is obtained; paint - and if you change the ratio between colors, you can get different tones of green.
Cut a round (larger) lemon in half across. Leave one half intact, and cut a circle from the other so that about 2.5 cm remains to the end.Thus, two circles of different diameters are obtained. Cut the oblong lemon in half lengthwise and cut one of the halves in half also lengthwise. Cut the bananas (unpeeled) in half lengthwise exactly in the middle.
Place the fabric to be decorated on a smooth board made of soft wood (linden, poplar, birch) or on a hygroscopic substrate. Take one half of a banana, remove the pulp, and smear the cut of the peel with yellow paint. Stem banana paint with green and brown paint. Take the prepared form carefully in both hands with a cut down and drop it from a height of 0.5 m onto the fabric.Make such prints all over the fabric, but so that there are empty areas for printing lemons. Instead of yellow, some banana peel prints can be made with light green paint.
After finishing your banana peel work, start making lemon prints. Take a large half of the lemon in your left hand, brush the cut of the peel and the radial lines of the fleshy part with red paint, and the fleshy part with yellow paint. Place the prepared form between the banana prints.
Now take a little half lemon, spread the cut of the peel and radial lines with yellow paint, in which add a little green, and the fleshy part with red. Make these prints randomly on the empty spaces. Color the oblong parts and circles of lemon in the same way and make prints with them. After the paint dries, iron the fabric through a towel from the wrong side with a weakly heated iron.
If the paint sheds during washing, it means that it is not firmly fixed, so make the so-called fixing (fixing) of the dye. Place the dried cloth on the wire rack in a pressure cooker, add a little water and heat it until hot and abundant steam is obtained, leave the tap open. If you do not have one, you can steam the fabric in a clay pot with a hole in the lid. To do this, place the fabric in it on a suitable grid that does not come into contact with water.
Potato printing
This decoration method requires a white or very light material, as otherwise the prints are unclear.
Cut fresh and strong potatoes as much as possible. Dry the cut by pressing it against blotting or filter paper. Then draw on it with a soft black or carbon pencil and cut with a sharp knife. Cut the stamp so that it is higher than the base. Stamps should be straightforward and straightforward so that they can be cut well. Apply water-based ink to the stamp and check the print quality on the paper.
Pour the paints into plates and other flat containers, place a square piece of felt (for example, from an old felt hat) on top. The felt absorbs the paint and becomes a kind of tampon.
Press the potato stamp lightly against the paint-soaked swab, and then print the pattern on the material in the intended order. To achieve clean tones, use a separate stamp for each color.
Do not interrupt work with potato stamps as they dry out and shrink quickly. After finishing work, dry the material for 2 hours, then iron it first from the wrong side, and then from the front side. At the same time, make sure that iron not overheated.
The described printing method can be used to decorate curtains, tablecloths, napkins, towels, etc. The stamp can be made from cork in the same way. Plugs are also used for making round dot-shaped prints.
Miladinov P. Useful tips and recipes for everyone
|